Tortoises should stay in, and predators should stay out. Also, as escape artists, tortoises require both a below-ground barrier and something they cannot scale
Indoor enclosures have their strengths, but nothing beats the outdoors. Turtles and tortoises are generally healthier outside, and the enclosure’s size isn’t as major of a determining factor. Lighting isn’t a concern, and a well-planted, spacious area obviates irritating cleanups. If you have the option, an outdoor enclosed space is not to be missed.
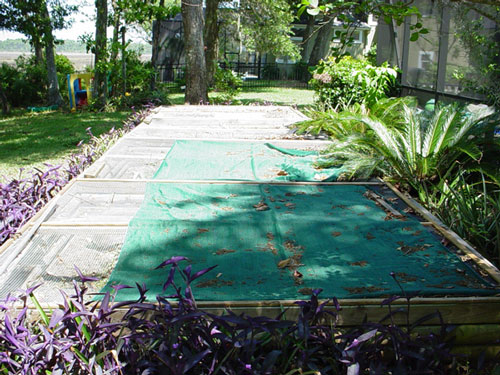
Photo by Chuck Schaffer
These completed modular pens have their tops closed.
That isn’t to say drawbacks to the outdoors don’t exist. They do; they’re just different. If a turtle or tortoise escapes inside, you likely will locate the fugitive. A chelonian that escapes outdoors might not be so easy to find. Dogs, cats and children can be an issue indoors, but they don’t compare to the myriad of predators in the great out-of-doors. A well-thought-out and sturdily constructed outdoor enclosure can foil the hungry (and curious) hordes.
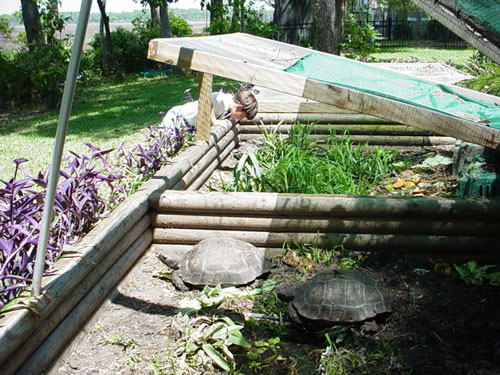
Photo by Chuck Schaffer
Make sure tortoise enclosures, once finished, are somewhere they can be enjoyed every day.
I provide the basics here and leave the specifics up to you. When constructing a simple outdoor habitat, there are a few givens. Bigger is generally better, and the simpler the setup, the easier it is to maintain. But remember, if you use your imagination, the end result could be something truly unique and spectacular.
Tortoise Pen Safety
The first consideration is safety. Tortoises should stay in, and predators should stay out. Also, as escape artists, tortoises require both a below-ground barrier and something they cannot scale.
Digging a trench a foot below ground to start your wall and burying hardware cloth under the enclosure’s floor are two generally good ideas. Distractions and structures inside the pen, such as edible plants, rocks and hiding places, also help keep idle minds from thoughts of escape — at least a little.
Besides subterranean escape attempts, you must also consider escapes over the top. Many enthusiasts use a one-and-a-half- or two-turtles rule in determining wall height, but turtles tend to stack. Many tortoises climb astoundingly well. I have seen hatchling Asian forest tortoises climb walls more than 10 times their length. Smoother solid wood or siding makes climbing much harder than hardware cloth or chain-link fences. An enclosure cover is the best choice, but in very large pens, an overhang the length of the tortoise seems to work well. Hinged and latched covers serve a dual purpose because overhangs don’t deter most predators.
Landscaping a Tortoise Pen
Try to landscape durably. Remember, tortoises are bulldozers that love to excavate. Edible landscaping is a big plus. Besides adding structure and beauty to the setup, it cuts down the feed bill and provides diversity in a tortoise’s diet. Grown plants or seeds may be used, but tortoises investigate and readily consume many sprouts. Some plantings need judicious planning. For example, my Manouria enjoy several varieties of aroids, which are toxic to most other living things.
Next, decide what size is appropriate. I prefer to construct modular pens. Like with the turtle tables, I generally choose size based on standard construction material dimensions, so it may come as no surprise that I build in 8-foot increments. This way I minimize cutting, and I have one less tool to tote around outside. Furthermore, both the pens and tops can be made in manageable sizes.
Build an Outdoor Tortoise Pen
First clear and mark the enclosure area. Make sure the site is somewhere you can see and enjoy the enclosure every day. Use 8-foot-long two-by-fours to mark it (Figure 1), but remember to leave room for expansion (Figure 2). Definitely make sure the enclosure is square. Measure it; don’t do it by sight. I’ve made that mistake before. Pen tops often don’t fit, and your problems are just beginning.
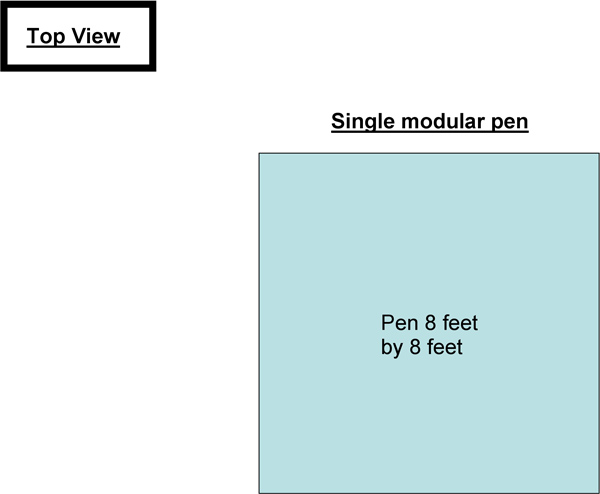
Figure 1.
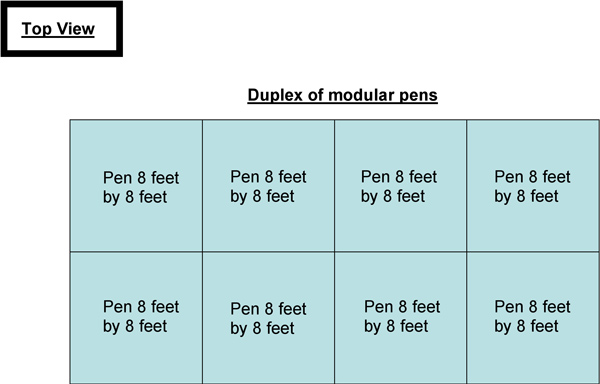
Figure 2.
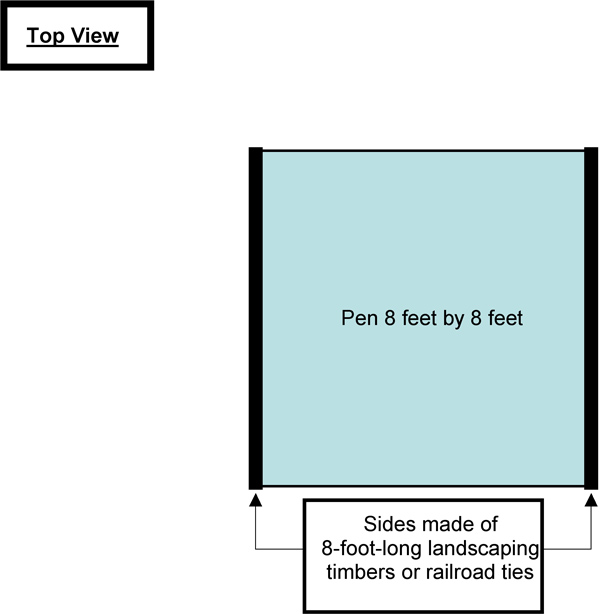
Figure 3
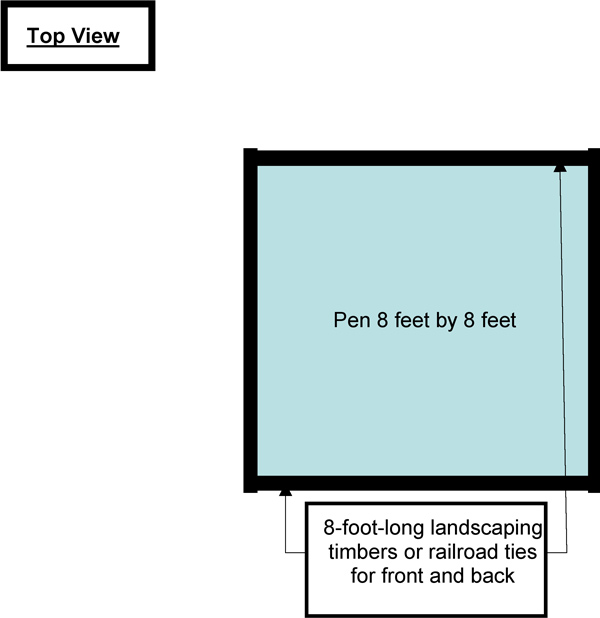
Figure 4
This project uses:
• 8-foot-long landscaping timbers or four-by-fours
• 8-foot-long two-by-fours
• 2-foot-long two-by-two lumber
• 4-inch-long two-by-two lumber
• hardware cloth cut 4 feet wide and 8 feet long
Dig a trench down at least 1 foot in the pattern you laid out. Being perfectly level isn’t important here. If you intend to cover the pens with tarps and heat them during the winter, it actually helps if it isn’t. Rain drains off the tops instead of pooling and possibly collapsing them.
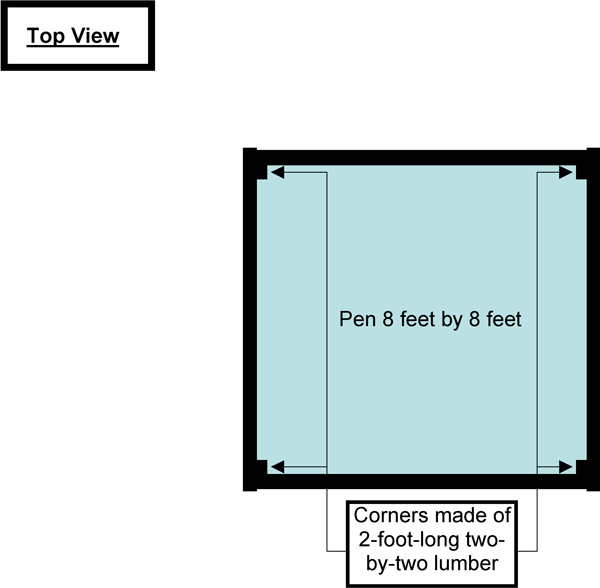
Figure 5
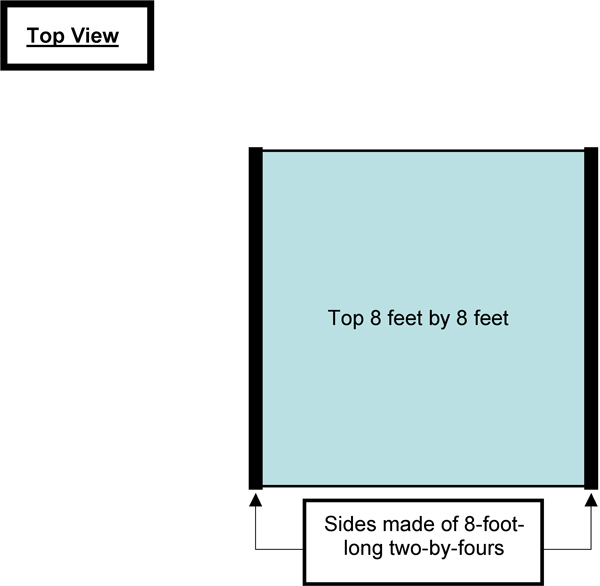
Figure 6
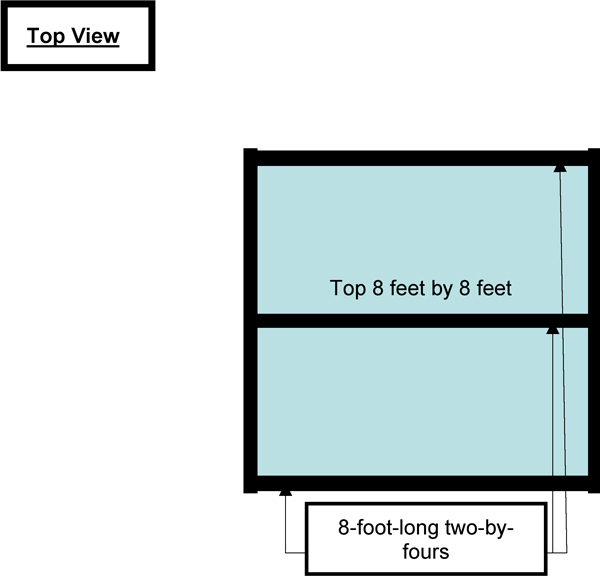
Figure 7
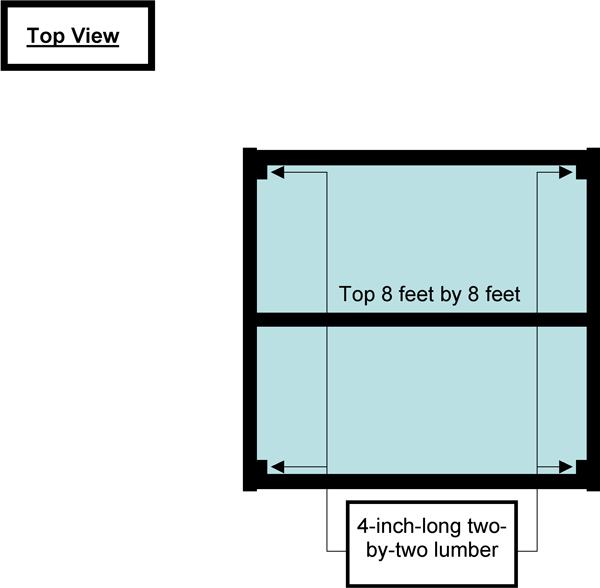
Figure 8
Step One: Using the 8-foot-long two-by-fours as guides, lay out the first row of pen sides. Place 8-foot-long landscaping timbers parallel to each other and about 8 feet apart (Figure 3).
Step Two: Using the 8-foot-long two-by-fours as guides, lay out the pen’s front and back. Place 8-foot-long landscaping timbers inside and flush with the pen sides (Figure 4). You can use one of the two-by-four guides to line them up. Repeat steps one and two until the wall reaches the desired height.
Step Three: Add the four corners. Place upright 2-foot-long two-by-two lumber along the pen’s inside corners (Figure 5). Drill through the lumber into the sides and the front (or rear depending on the corner) to anchor pieces in place. Pre-drilled holes cut down on splintering and splitting.
Once finished, the enclosure is a square of stacked wood, and the walls begin about 1 foot beneath the ground.
Construct a Top For Your Tortoise Pen
You’re halfway there. A top completes the pen and helps keep predators out.
Step One: Find a flat area to lay out the top’s sides. Place those 8-foot-long two-by-fours parallel to each other and about 8 feet apart (Figure 6). Have the lumber stand on a 2-inch side.
Step Two: Lay out the top’s front and back. Place 8-foot-long two-by-fours inside and flush with the top’s sides. Also place an 8-foot-long two-by-four in the middle parallel to the front and back. Make sure it is centered (Figure 7). Have all lumber stand on a 2-inch side.
Step Three: Add the four corners. Place upright 4-inch-long two-by-two lumber along the top’s inside corners (Figure 8). Drill through the lumber into the sides and the front (or rear depending on the corner) to anchor pieces in place. Pre-drilled holes cut down on splintering and splitting.
Step Four: Lay the two pieces of 4-foot-by-8-foot hardware cloth on the top, so each piece completely covers an open space. Extra hardware cloth should meet in the middle two-by-four. Staple hardware cloth pieces in place, fasten them with screws and washers, or cover hardware cloth ends with five 8-foot-long boards measuring 1 inch by 2 inches.
Now you can attach the top to the pen. Align the top’s rear to the pen’s rear, and attach these pieces with two hinges, one near each corner. I recommend stainless steel hinges. They are more expensive, but you should only have to attach the top once this way. Trust me!
Finishing Touches
From here it’s up to you. Water features can be anything from paint trays for tortoise hatchlings to kiddie pools for large adults. Waterfalls make a nice touch, especially in larger enclosures. Hiding areas range from halved landscaping pots to doghouses. The sky’s the limit.