Create a beautiful poison frog habitat in these 10 easy steps.
Poison frogs and tropical terraria belong together like chameleons and screen cages. It’s hard to picture one without the other. Living terraria are not the only way to house poison frogs, but they are the most popular method and for good reason. The frogs’ flashy colors fit well alongside elegant tropical plants and lively driftwood structures. Because they are small amphibians, they rarely trample delicate plants, and the minimal amount of waste they produce is easily recycled by beneficial microorganisms in a well-maintained terrarium. Follow the 10 steps outlined below, and you, too, can create an eye-catching display suitable for housing most commonly available poison frogs.

Photo by Devin Edmonds
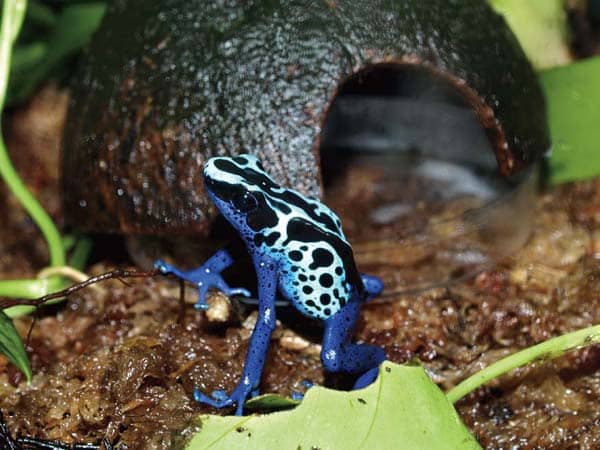
Dyeing poison frogs (Dendobrates tinctorius) such as this new river morph, make great tank inhabitants.
Step 1: Choose an Enclosure. The enclosure is your starting point. It is the canvas onto which you will paint your tropical terrarium. It must be waterproof in the bottom half and offer appropriate space for the poison frog species you want to keep. Standard aquaria work well, but it’s best to use hinged glass covers. Screen tops offer too much ventilation, and aquarium hoods have gaps in them that allow frogs to escape.
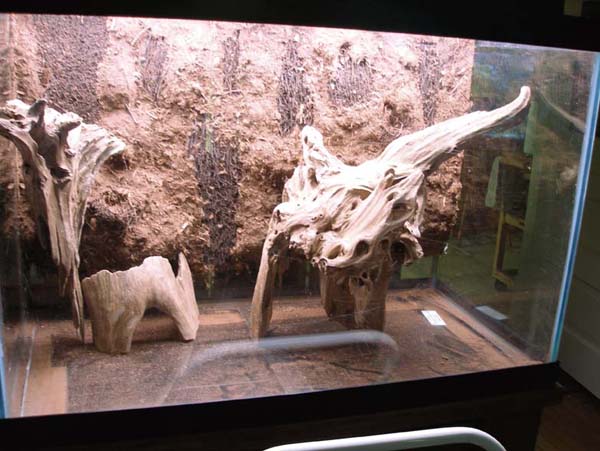
Photo by Devin Edmonds
The enclosure is the canvas onto which you will paint your tropical terrarium.
Special enclosures designed specifically for reptiles and amphibians offer an alternative to standard aquaria. Those with front-door access make maintenance easy. Avoid enclosures with large amounts of ventilation built into them because this makes it tricky to maintain high humidity levels, which is important for frogs and tropical plants.
Although a 10-gallon aquarium offers enough room to keep a pair of many poison frog species, an enclosure this small limits the ways you can landscape and plant your terrarium. If you are new to terrarium building, I recommend starting with something around the size of a 20-gallon high aquarium or slightly larger. An enclosure of this size offers room for creativity but is not overwhelmingly large. Depending on the species and final tank layout, two to six adult frogs can comfortably fit in this enclosure. Wipe it down with a moist paper towel before adding anything.
Step 2: Brighten up the Place. Poison frogs do not require special lighting, but the lighting you pick affects the plants and appearance of the terrarium. Two standard T8 or T12 fluorescent bulbs that span the length of the enclosure will do the job, but using more powerful lighting is advantageous because it promotes better plant growth. Although more expensive than standard fluorescent lighting, both high-output T5 fluorescents and compact fluorescents are well-worth the higher cost.
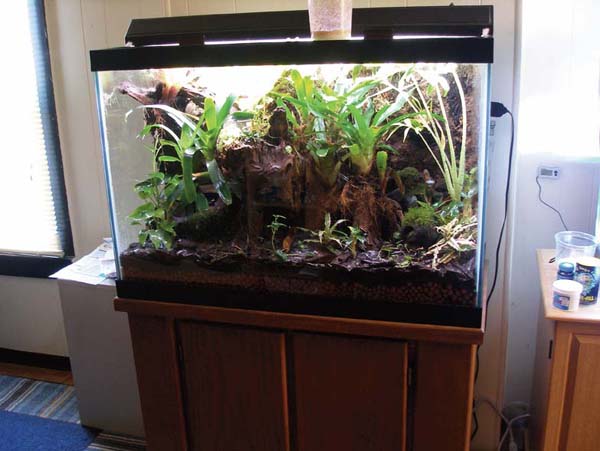
Photo by Devin Edmonds
The lighting you pick affects the plants and appearance of the terrarium.
Whichever type of lighting you choose, pay close attention to the color temperature of the bulb. Bulbs around 5,500 Kelvin produce light similar to rays of the midday sun, and they are ideal. “Grow lights,” bulbs used for plant propagation, are best avoided because they tend to tint the terrarium an unnatural purple or red, though this hue can be offset in combination with other bulbs. Plug all lights into an electrical timer set to provide light 10 to 12 hours a day.
Step 3: Build the Background. An important aspect of terrarium design is the background. By attaching material that plants can grow on to the back (and sides if you wish) of the enclosure, you add a new dimension to the terrarium.
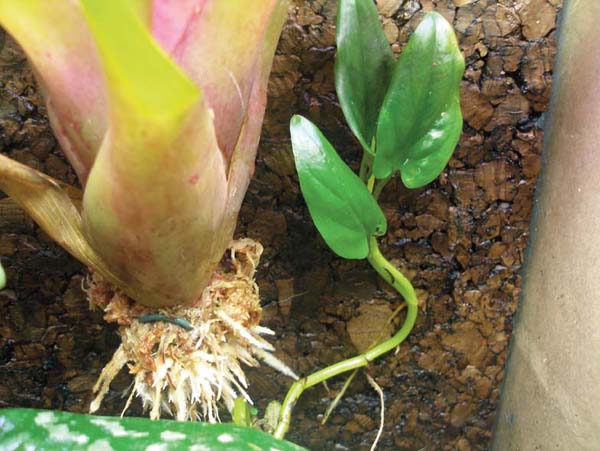
Photo by Devin Edmonds
By attaching material that plants can grow on to the back (and sides if you wish) of the enclosure, you add a new dimension to the terrarium.
There are many types of backgrounds. Cork bark is a great option because it is affordable, comes from a renewable source and epiphytic plants readily grow on it. Available from terrarium supply companies and specialty pet stores, pressed-cork-bark tiles are easiest to use because they’re flat. Raw-cork-bark flats can be used instead, but take care to fill in the gap between the curved bark and the back of the enclosure with coco-fiber, orchid bark or dried moss, so your frogs do not climb behind the background. Other background materials, such as tree-fern panels or flexible coco-fiber sheets, can be used instead of a cork product if you prefer.
Use aquarium-safe silicone sealant to affix backgrounds to glass. To do this, first stand the enclosure on its back. The surface you are attaching the background to should be parallel to, and closest to, the ground. Next apply several lines of silicone sealant to the glass. Press the background into the sealant, and allow it to dry for at least four days.
Step 4: Establish the Plumbing. Once the background is secured and the tank no longer smells strongly of silicone sealant, it’s time to add a drainage substrate. This initial base layer allows excess water to gather beneath the planting mix so it doesn’t become waterlogged.
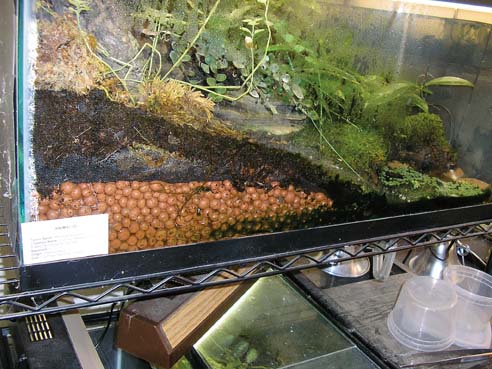
Photo by Devin Edmonds
A favorite material for use as a drainage substrate is lightweight expanded clay aggregate (LECA). These clay pebbles are available from hydroponic or terrarium supply companies.
My favorite material for use as a drainage substrate is lightweight expanded clay aggregate (LECA). These clay pebbles are available from hydroponic or terrarium supply companies. LECA is lighter than gravel, an alternative drainage substrate, so it’s ideal for moderately sized terraria, which become impressively heavy if filled with gravel. Using a kitchen strainer or something similar, rinse LECA before use to remove dust and other fine particles, and then pour enough into the terrarium to fill it 2 to 3 inches deep. Atop the LECA, place a piece of fiberglass window screen cut to fit the floor plan of the enclosure. This prevents the substrate from mixing into the drainage area.
To help make water removal easy, leave one corner or end of the tank bare. Use cork bark, several river stones or a tree-fern slab to hold back the LECA. Add a thin layer of gravel or freshwater-aquarium sand over the exposed glass to improve the appearance. This area will turn into a small pond as water accumulates in the terrarium, and you can drain it when the time comes.
Step 5: Layer on the Substrate. Not any old substrate can grow plants or be used with amphibians, so take care to choose the right one. Avoid regular potting soil and topsoil because they break down quickly in wet environments, and they often contain chemicals or materials unsafe for poison frogs. You can purchase special substrates designed specifically for terraria from some pet stores, or you can create your own mix.
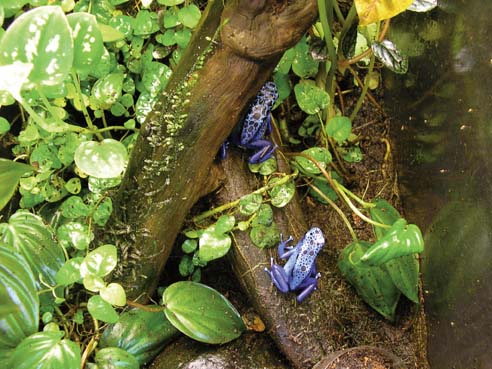
Photo by Devin Edmonds
You can purchase special substrates designed specifically for terraria from some pet stores, or you can create your own mix.
Before adding the substrate to the terrarium, mix in water until the substrate holds its form when squeezed in your hand. Give it a good stir in a bucket or garbage bag, allow it to fully absorb the water, and then place 2 to 3 inches of this mix throughout the terrarium. You can sculpt substrate to form hills or gentle slopes, but over time these will level off if they’re not supported.
Consider placing a layer of leaf litter on top of the substrate. Leaf litter improves the appearance of the terrarium, provides hide spots for the frogs and helps support beneficial microorganisms as it decomposes. Live oak or magnolia leaves work well, but let them thoroughly air-dry before use to avoid introducing pests or pathogens, and make sure they are collected from a pesticide-free area.
Create Your Own Substrate
2 parts coconut husk fiber (available from pet stores)
1 part coconut husk chunks (available from pet stores)
1 part milled sphagnum moss (available from garden centers)
Blend items together. Some people substitute peat moss for coconut husk fiber, but I usually avoid it because it is acidic and has a short life span in a terrarium. Leaf compost, fir bark, tree-fern fiber and other organic material can be mixed into this basic substrate blend if desired.
Step 6: Decorate Like a Sage. Once the drainage layer and substrate are in place, it’s time to get creative. Start with a central wood structure. Placing dynamic pieces of driftwood or cork tubes at just the right angle takes patience, but once you find the perfect position you’ll know it. The woods to use in poison frog terraria are heavy driftwoods, the type commonly used in planted aquaria. Cork bark also is useful. Cork tubes can be split open down the side, filled with orchid bark or sphagnum moss, and then planted to appear like an overgrown fallen log. In small to moderately sized terraria, you’ll find it looks most natural to use only one type of wood.
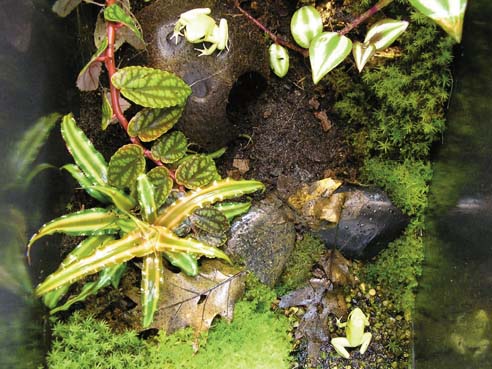
Photo by Devin Edmonds
Rocks, vines, coconut huts, jungle pods and other cage items can be added after a central wood structure is in place.
Steer clear of grape wood, grapevine or cholla wood. They are not suitable for high-humidity environments. Also avoid using wood collected outside unless you are positive of its type and are certain it is safe for use with poison frogs.
Rocks, vines, coconut huts, jungle pods and other cage items can be added after a central wood structure is in place. Take care not to make your terrarium look too busy with these items. Plants will fill in empty space as they grow, so rather than litter the enclosure with an assortment of stones and twisting vines, it may be best to add these decorations at the end if necessary. Sometimes a single driftwood structure planted with attractive epiphytic plants is enough to achieve the look you want.
Step 7: Add Some Chlorophyll. Live plants are the key component of a terrarium. I’ve found mail-order terrarium supply companies to be the best way to acquire good species. Local plant nurseries may also have some that work, but remember that a small plant in a 2-inch-diameter pot does not necessarily remain that size, so dwarf varieties are what you seek.
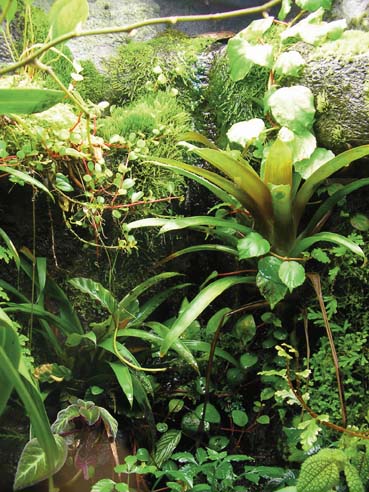
Photo by Devin Edmonds
Live plants are the key component of a terrarium.
Wash all plants thoroughly before use. If you suspect they have been exposed to pesticides, leaf shiners or other harmful chemicals, grow the plants outside the terrarium for several weeks after washing them to allow chemicals to fully dissipate.
Attach epiphytic plants to the terrarium background with floral wire. Make U-shapes out of wire, and press them into the background around the plant and a small clump of wet sphagnum moss. The moss allows roots to develop, so the plant eventually grows into the material you attach it to. An arrangement of dwarf bromeliads of the genus Neoreglia looks spectacular when spaced unevenly on the back of the tank and attached in this way. Poison frogs use their leaves for support and climbing spots, and some frog species even raise tadpoles within the water-filled axils.
Read the poison frog care sheet here.
Trailing plants can be trained to grow up backgrounds. First plant them in the substrate near a background, and then anchor plant sections into that background with floral wire. Dwarf trailing varieties of Peperomia look like little green buttons on a background when grown in this manner. Dischidia and Hoya species form networks of contrasting vines. Creeping fig (Ficus pumila) can also work well on a background, but it must be pruned regularly, or the attractive green shingling it forms takes over the entire tank.
You can use fishing line or floral wire to tie an additional bromeliad or two to your wood centerpiece. Stuff moistened sphagnum moss around the base of the plants.
Pothos (Epipremnum pinnatum) is a popular plant among poison frog keepers, but I recommend choosing its slower-growing sister, Scindapsus pictus, instead. Both are readily available from garden centers. You can also try using dwarf Philodendron species. Plant them directly into the substrate near a wood structure so they grow around it, or simply drape cuttings throughout the tank. Cuttings take root quickly in the high humidity of poison frog terraria.
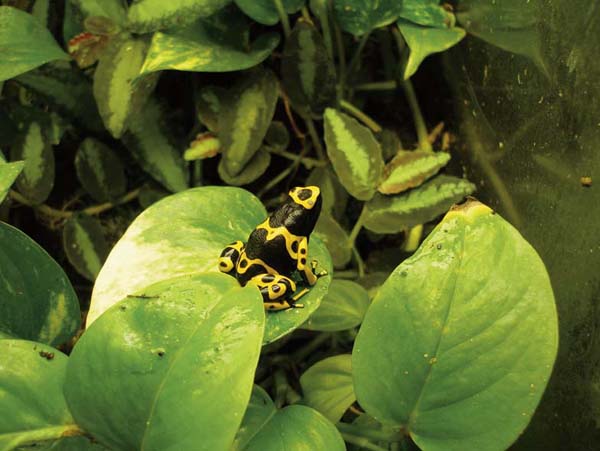
Photo by Devin Edmonds
Mist your terrarium with water daily or every other day.
Buying or collecting live moss is unnecessary. Although it’s frequently sold by terrarium supply companies, most live moss rarely lives long in terraria. If six months pass before it turns brown and dies, you’ve done well. Instead, most terraria develop moss on their own if given enough time. Sometimes moss may not show up for a year; other times little green patches appear on the background or on wood within weeks.
If you desire a lush moss carpet but are unwilling to wait, try using one of two commonly available aquatic plants as alternatives. Java moss (Vesicularia dubyana) is sold for use in aquaria, but laid out on terrarium substrate, it soon takes on an attractive mosslike terrestrial form if it’s kept moist. Java moss can also be draped over pieces of wood or be trained to grow up a background. Another option is a liverwort called riccia (Riccia fluitans). Like java moss, it grows over the floor of a tropical terrarium and forms an attractive bed of bright green if it’s kept moist. However, you need strong lighting in order to grow riccia. High-output T5 fluorescent tubes or power compact fluorescents are best.
Step 8: Live and Let Grow. Now comes the hard part. You have just created a beautiful terrarium perhaps spending weeks selecting an enclosure, securing the background, positioning wood and finally planting lively tropical plants. It’s time to introduce your frogs to their new home, right?
Wait! Before adding frogs, let the terrarium mature for several weeks. This initial period allows plants to establish. Without it, frogs may knock over freshly mounted bromeliads or uproot smaller plants. The wood, background and other organic material also need time to acclimate to humid conditions. It’s common for molds, particularly white cottonlike types, to develop during these first few weeks. Don’t fret; it’s a perfectly normal part of establishing a terrarium, but if mold persists for more than a month, remove the rotting object.
Most importantly, though, these first few frog-free weeks allow you to monitor environmental conditions. Keep an eye on the temperature and humidity. Most poison frog species live well with daytime temperatures peaking near 80 degrees Fahrenheit and nighttime temperatures around 70 degrees or slightly cooler. Keep ambient humidity levels between 70 and 100 percent by misting the terrarium daily and restricting ventilation.
Step 9: Introduce the Hoppers. An amazing variety of captive-bred poison frogs can be found for sale. Only introduce large juveniles or adults to the enclosure.
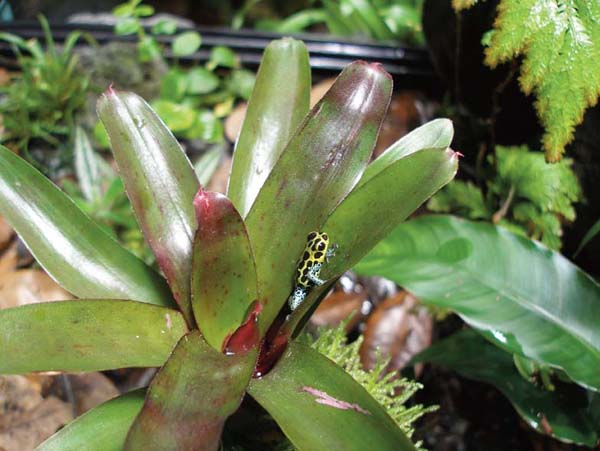
Photo by Devin Edmonds
An amazing variety of captive-bred poison frogs can be found for sale.
Also, house only one color morph of one species per terrarium. For example, do not house powder-blue and citronella dyeing poison frogs together even though they are the same species, Dendrobates tinctorius. Many poison frog color morphs can be traced back to fairly specific localities, and they are naturally occurring color variants. Housing different species or different color morphs of a species together risks hybrids being produced or morphs being mixed up.
Quarantine new frogs in a simple enclosure first before introducing them to the terrarium to ensure they are healthy. A 5-gallon aquarium or similarly sized plastic storage container with moist sphagnum moss, a shallow water dish and a few pothos clippings will suffice. By initially keeping frogs in a simple setup, you help safeguard against introducing disease to your terrarium. Monitoring frogs for a month or more in this setup is good practice. Ideally you could set up this quarantine tank about the same time you have to let your newly finished terrarium become established.
Froglets younger than 4 to 6 months old should be kept in small setups, so they can be monitored easily and do not have to navigate a complex terrarium to find food.
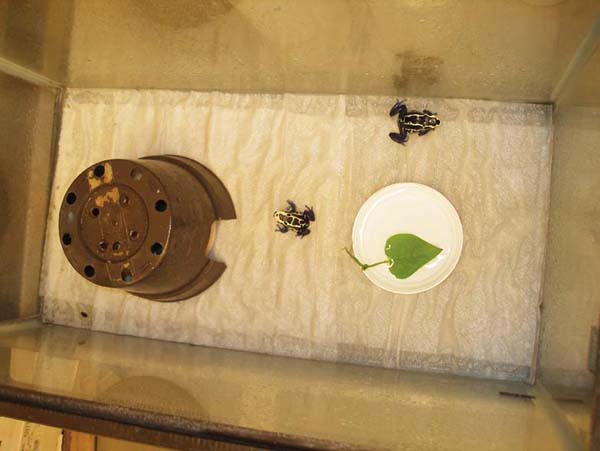
Photo by Devin Edmonds
Keep froglets in small setups until they are big enough to find food in a complex terrarium.
Step 10: Maintain Your Creation. Although easy to care for, terraria are not maintenance-free. Mist your terrarium with water daily or every other day. Use distilled or reverse-osmosis water to maintain plant health and to avoid water spots on the glass. Spray waste, such as frog feces and dead feeder insects, off cage items and down to the substrate below where beneficial bacteria can do their job. To maintain visibility, clean the inside and outside of glass weekly, and wipe it with a moist towel. You can use a razor blade to scrape film and algae off glass if necessary. Annually replace light bulbs, regardless of whether they burn out, and make sure the top stays clean, so ample light reaches the plants inside. With plenty of light, plants grow quickly, and once a month or so the terrarium may need to be pruned. Lastly, you’ll have to siphon water from the drainage layer as it approaches the substrate.
Unlike more traditional amphibian housing, living terraria kept in good condition do not need to be broken down and completely cleaned. A healthy terrarium has a fresh smell to it, not a sour or ripe odor. Sections of the substrate can occasionally be replaced if waste is concentrated in an area, but avoid changing the entire substrate because you remove beneficial microorganisms along with the waste.
A carefully designed terrarium is the perfect way to house poison frogs. There are many approaches to terrarium design, so take your time planning, and research multiple ways to do it. Most importantly, though, have fun creating it. Keeping frogs is enjoyable, but producing and maintaining an attractive living system for them can be equally thrilling.
DEVIN EDMONDS has kept amphibians, both at home and professionally, since childhood. He runs a popular website about their care: amphibiancare.com.

