Herping in your own backyard can be fun provided you do a little planning.
As soon as spring arrives, I go herping, and the first 50-degree night has me outside, looking for spring peepers. A friend of mine with a pond near the interior of the Pine Barrens in New Jersey once called me up to have a look. As I crept up to the water, a handful of southern leopard frogs jumped in. After a few minutes of trying to see what else was around, I noticed the bird feeders scattered around the pond’s edge. I asked him what species of birds frequent the area, and he scratched his head and said there’s not too many. I followed up his answer with, “But aren’t feeders supposed to attract birds?”
Read More
Herping the Jungles of Costa Rica
Justin A. Bragg
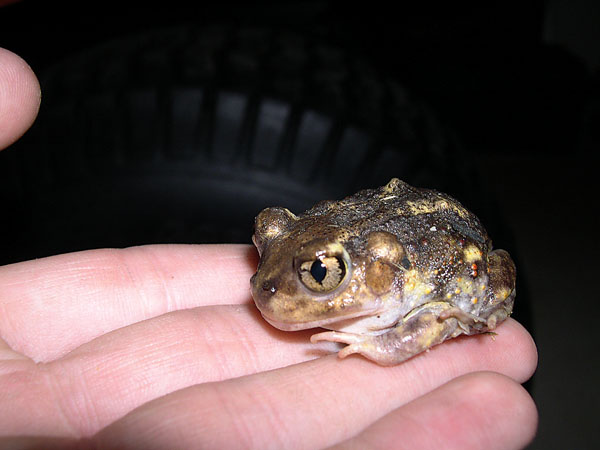
Toads, like this eastern spadefoot toad (Scaphiopus holbrookii), may seek refuge under coverboards.
Flicker… spark! I had an idea.
Why should only birders have their fun? Why should we, as herpers, always have to travel far and wide to see reptiles and amphibians? That’s when I began to employ four ways to attract and observe these creatures without leaving my backyard.
Justin A. Bragg
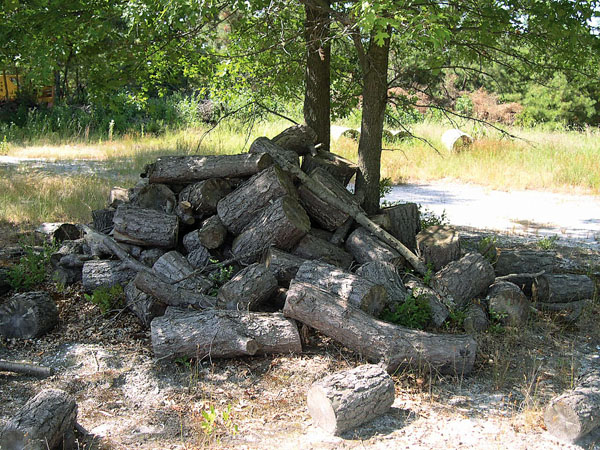
A pile of logs can be a great place to see herps, both sunning themselves on top or hiding beneath.
Before We Begin
First, a few disclaimers. Do not try to attempt the methods described in this article on property that is either private or state owned without documented permission. Please do not use them to collect or harass wildlife—there are laws against this in every state—use them only to view reptiles and amphibianas and not to profit from them.
Be responsible and take care to not harm wildlife due to negligence when setting up the herp-attracting methods described here. For example, do not use any pesticides near an area to which you are attracting herps, and be sure you are not using chemically treated plywood for coverboards (more on them later). The idea is to minimize our impact on the animals while still being able to enjoy viewing them.
It is possible that not all of the following methods will work for you. Sometimes a combination works best. For example, using a pond and PVC refugia around the pond may produce better results. And of course, not everyone has the same local herps in their backyards, so develop a local species list and see which ones you would like to attract—or better yet, try to get the whole neighborhood involved!
Method 1: The Coverboard
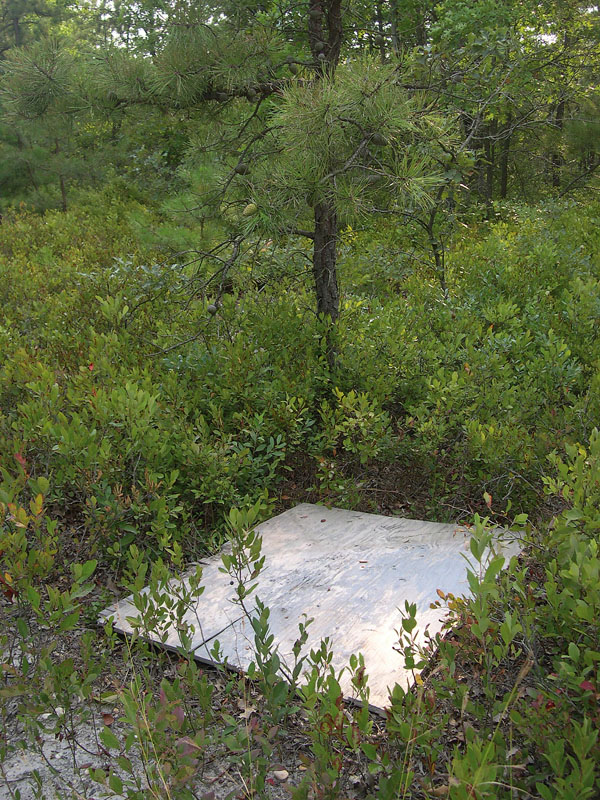
This method of attracting herps is relatively cheap and simple. You will need a standard piece of plywood from a local lumber or hardware store, or if you have scrap wood lying around, you are in even better shape. If using standard plywood, cut your sheet into three equal parts using a saw. You can cut them larger or smaller if you would like, but cutting them into three equal pieces has been the most efficient use for me. You now have what is commonly referred to as a coverboard. I like to number my coverboards for data-taking purposes, but also so I know if one goes missing. If you have any luck like I have, then one of your boards may seduce more herps than other boards. Once the boards are cut and numbered (optional), the next step is easy: lay them down someplace you think a herp would go. If you have a woodland edge on your property, place a few there. The more you place on your property, then the greater chances you have of eventually finding all sorts of goodies underneath later. Other great areas to place your boards are on the fringes of meadows, marshes (awesome for kingsnakes) and even near barnyards.
JUSTIN A. BRAGG
Placing a coverboard in your back yard, positioned near the edge of a wooded area, can attract herps.
I wait a day or two and then go out and check to see what I can find under them. You can check them however many times a day you want, but I would try to limit it to only once a day. If you live in a temperate state, you should pack the boards up at the end of the season (usually around November) and then bring them back out for early spring. Winter weather can warp, rot and crack boards over time.
Don’t forget to keep a journal and take pictures of the species that you find. Some states have volunteer programs, such as Herp Atlas, where volunteers fill out data sheets of sightings and then submit them to the state fish and wildlife department as data. If you live in rattlesnake country, or in an area that is known to have venomous herps, then please take the proper precautions and use tools (snake hook, long tongs, rakes, etc.) to lift the coverboards. This is a good practice in general, because even non-venomous herps can bite you if they are suddenly startled, so be safe.
Method 2: Log Piles
Our next method is very similar to the previous one, and it can be just as effective. Logs can also be a great tool for attracting herps. You won’t be looking at that firewood pile in the same way again. There is no right way of doing this, but it all starts by figuring out where you want to lay out your pile. I like to choose a spot that is not too far away from a forested edge (obviously, people who have woods bordering their properties have an edge over everyone else when it comes to attracting herps to their backyards), so as to give any animals a refuge in a more open area. Plus, it can serve as a safe corridor for animals passing through from one forested edge to the next.
JUSTIN A. BRAGG
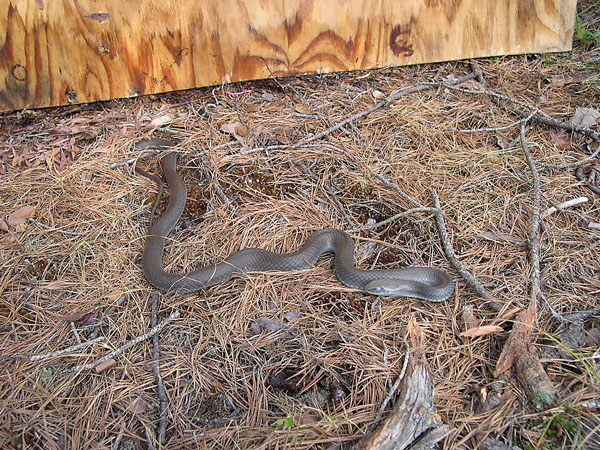
The author found this black racer (Coluber constrictor) under a coverboard.
The next step is to lay out your logs in any pattern that you think a herp would find inviting. Try to overlay logs to create pockets and spaces that they can use to escape from predators, stay out of the sun or bask in it. If you lay the logs more tightly compact, then it will change the microclimate that you are creating; thus, it will hold more moisture. This is great for amphibians or reptiles looking for areas to shed their skins. Keep in mind before locating a log pile too close to your house, that it can also attract vermin, such as termites and mice. (I know, I know—mice are good to attract if you want to see some snakes!)
Over time the logs will decay and you will have to replace them. I have found that decayed logs make great additions to the compost pile. If left to dry, they can be used as firewood.
Checking log piles for herps requires more work than checking coverboards. You’ll likely need to pick logs up and move them around, though I also find that log piles are great to view from afar. Sit on your back porch with binoculars for an hour or two in the early morning, and depending on where you live, you may see a whole range of animal activity around a pile.
You can create a brush pile by building up layers of logs and branches, but I think this method limits the viewing area and requires more prodding and poking within it when looking for herps. If you live in an area that is more rocky than woodsy, consider a rock pile, stacking flat rocks or boulders (be sure they are sturdy and can’t topple over).
When setting up any of these piles, remember that the hiding places they provide may also attract invertebrates such as spiders and scorpions, so be careful when you are poking through them looking for herps.
Method 3: PVC Pipe Refugia
Now we are going to get a bit more complex. So far we have been learning how to attract ground-dwelling reptiles and amphibians; now let’s change our focus to the arboreal species. If constructed correctly, PVC refugia can be great ways to interact with and observe tree-walkers while not upsetting the balance of nature.
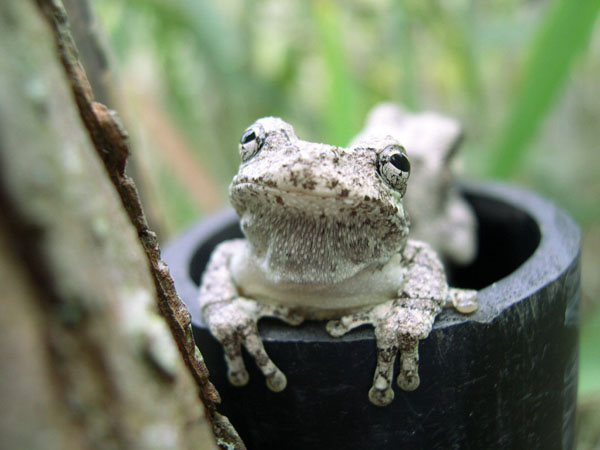
JUSTIN A. BRAGG
On many occasions, the author would find gray treefrogs (Hyla chrysoscelis) resting on top of the opening of PVC pipes he attached to trees.
I construct PVC hides by cutting standard white, schedule-20 PVC pipes into 2-foot sections. I cap each section at one end, and drill a hole in the side of the pipe about 4 inches up from the capped bottom. This will allow a few inches of rain water to accumulate at the bottom of the pipe when it is placed vertically, without filling the entire pipe. This water is important because it provides a microhabitat that will attract tree frogs. I remove the bottom cap every few weeks to drain the water inside, because stagnant water can harbor mosquito larvae as well as bacteria that are harmful to frogs.
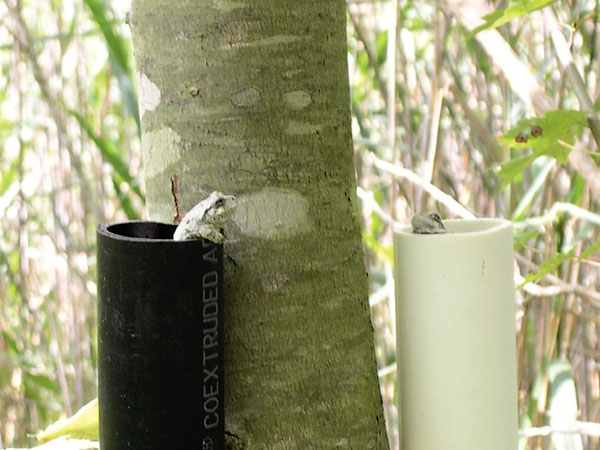
JUSTIN A. BRAGG
Find trees that are in close proximity to water, and hang the pipes on them.
To hang a PVC hide, drill some holes into the pipe a few inches from the top, then thread some fishing line through them and around a tree to tie the pipe to the tree.
Placement is crucial. I have never placed them in dry, upland-type habitat, so I don’t know their effectiveness in attracting lizards or snakes that may climb trees, but I can personally attest to their effectiveness in attracting tree frogs. If there is a pond (man-made or natural) or a small stream on or close to your property, you have hit the jackpot! Find trees that are in close proximity to the water, and hang the pipes on them. I like to hang them just high enough so that I don’t need a ladder to look down into them when checking them, with the opening at or just higher than eye level.
You can also try sinking PVC hides into the ground, so they stick up 18 inches or so, though this positioning is not usually as effective at attracting herps.
Checking PVC refugia is easy, though on cloudy days, a flashlight may be useful to see clearly down into them. Check them often and experiment with hanging them at different heights and in different positions.
Photographing animals in the pipes may be difficult, but if you sneak up to the pipes, you may see the animals outside of them. For instance, on many occasions, I would find gray tree frogs (Hyla chrysoscelis) resting on top of the openings at the tops of the pipes. If you approach them slow and stealthily, they can usually be photographed without distubing them.
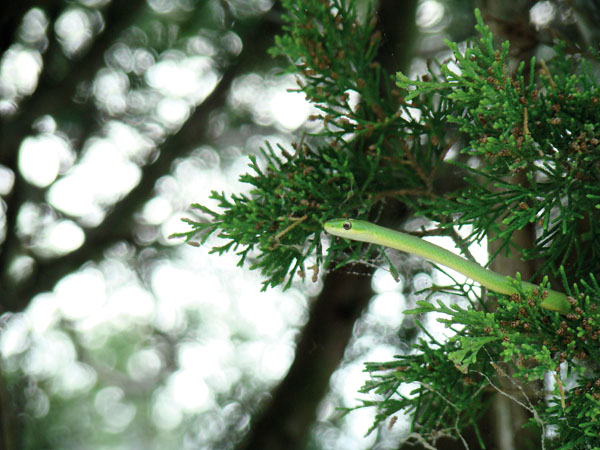
JUSTIN A. BRAGG
A smooth green snake (Opheodrys vernalis) emerges from the low branches of a tree.
On a few occasions, I was surprised to look into the pipe to find a juvenile black rat snake (Elaphe obsoleta) striking at me. One time I pulled one out and found three bumps along its body—and it so happened that that pipe had three tree frogs inhabiting it on most days. Needless to say, that particular discovery was quite a shock!
I usually take PVC refugia down in the fall, when temperatures get cold. They can be cut down easily with scissors or a knife, and I wash them with a mild soap and water (PVC hides such as these can get nasty if not maintained). I put them back up in the early spring, sometimes in different spots to see if I will obtain better recruitment of frogs. For people who live in milder climates, it might be advantageous to leave the pipes up year round to see what might stick around for the winter.
Method 4: Build a Pond!
Backyard ponds are often overlooked as suitable habitat for native animals. If constructed correctly, they can attract all sorts of herp species, aquatic or not. The pond can be as large or small as you would like and with varying degrees of aesthetics. Placement of the pond is important, depending on what species you would like to attract. If the pond is large and placed in a sunny spot, it may attract turtles. However, if it is small and in a sunny location, then it may dry up for periods of time, which might make it more attractive for amphibians that prefer vernal ponds.
Without getting too specific, I will lay out some general principles to create attractive (not necessarily to us) ponds. Most herps like ponds that are easy to get in and out of, so gradually sloping sides are preferred. If you make the pond deep enough, some species may overwinter in them, so depth is important. Depths of 2 feet or more are generally better. The bottom can be made of pond liner or a natural bottom. There are many pond supply companies that offer clay materials that can be used as a liner. A layer of mud or leaf litter on top of the liner is good for most species that overwinter; plus, it will make the pond look more natural.
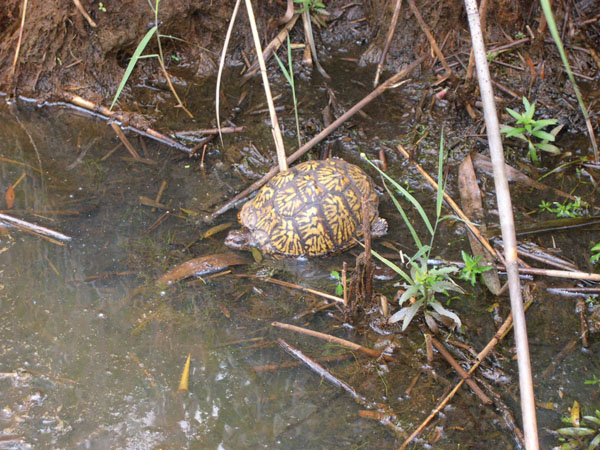
JUSTIN A. BRAGG
Small ponds can be havens for herps like this eastern box turtle (Terrapene carolina carolina).
Be sure to place a fence around the pond if you have small children. The slats of the fence should be wide enough to allow herps through, but not babies or small children.
Flowing water is not preferred by most amphibian species, but stagnant water can result in some difficulties, such as mosquitoes and their larvae (health inspectors don’t like it, either). If you are worried about these little bloodsuckers, there are many ways to eradicate them. First, place vegetation around and in the pond. This will not only provide shelter for the herps, but it may also attract dragonflies, which are known to predate on mosquitoes. Bat boxes placed close to the pond may help take care of the bugs; that is, of course, if you can attract the bats. Mechanical devices that are designed to trap or deter mosquitoes may also be used, but these do not discriminate and may kill other insect species that are not harmful. Fish can be introduced to the pond to take care of mosquito larvae, but this will also inhibit many amphibians from using the pond. Frogs and salamanders, once established around the pond, will also eat the mosquitoes, at just about every stage in the insects’ life cycle.
Pesticides should never be used near a pond; they can result in a pond that is devoid of all life. Ponds are very much an ecological experiment, and like living organisms, they frequently change over time. The more established the pond is, the more balanced it may be, and as a result, older ponds may not require as much effort in regard to mosquito control. For more ideas on how to construct frog-friendly ponds, check out Treewalkers International (treewalkers.org/operation-frog-pond).
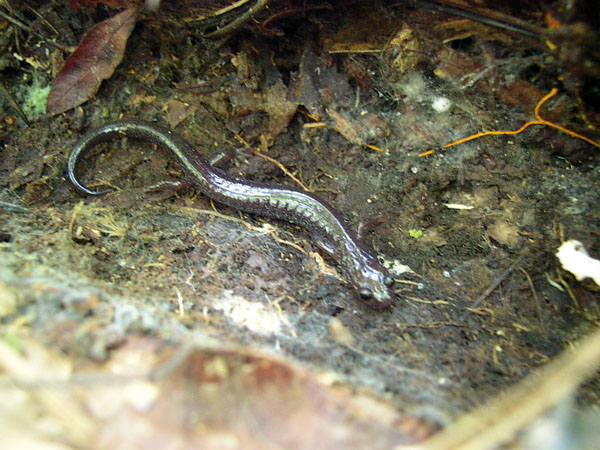
JUSTIN A. BRAGG
This leadback salamander (Plethodon cinereus) was found in the author’s log pile.
Summary
In conclusion, with the right materials and knowledge, you can create a habitat on your property, with connections to corridors of natural habitat, that should increase your chances of seeing many fascinating animals. Just remember to be respectful of nature, so you can enjoy your new herp neighbors.
Justin A. Bragg is a biology teacher for the Egg Harbor Township school district in New Jersey. He worked as a herpetologist for the National Aquarium in Baltimore, the Wetlands Institute, and the NJ Endangered and Non-game Species Program. He co-founded dendroboard.com, an educational site about the care and breeding of poison dart frogs.


