Building an indoor Russian tortoise breeding enclosure.
When creating an enclosure, specific rules, measurements, materials, etc., need not be used. The concept is what is important, and the concept is simple: A surface with holes cut in the floor to accommodate nesting bins, sides tall enough to prevent escape but low enough to provide access, and some sort of top to help contain environmental conditions.
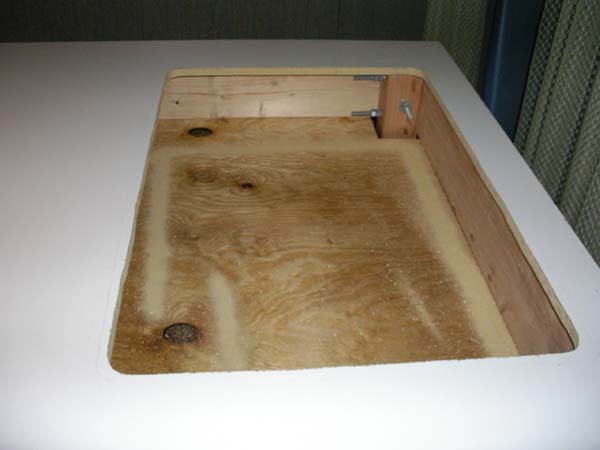
Photo by Ryan Farnung
Step1a: A frame built with 2-inch-by-8-inch dimensional lumber and plywood, attached to the bottom, to support the floor of the bin.
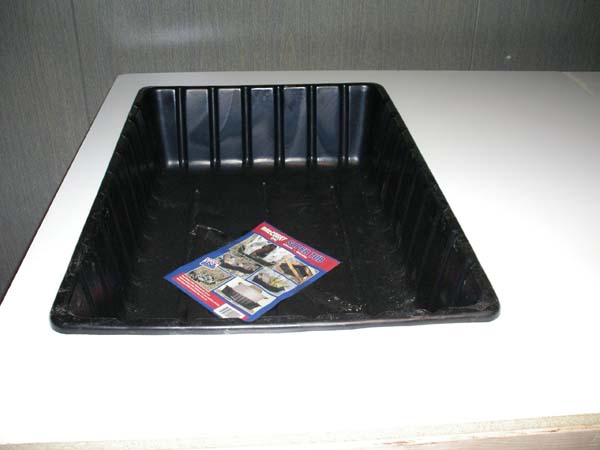
Photo by Ryan Farnung
Step1b: A rubber bin for the nest area..
Step 1: The Bins
This is the first design element that must be addressed, because the rest of the design depends on the size, shape and material of the bins. For a small group of tortoises (three or four), one sizeable nesting bin can be used. The bin should be at least 7 to 9 inches in depth to accommodate ample soil for digging nests. I prefer to use the large size concrete mixing bins available at home improvement stores. These bins are heavy duty and measure 2 feet long, 3 feet wide and 8 inches tall.
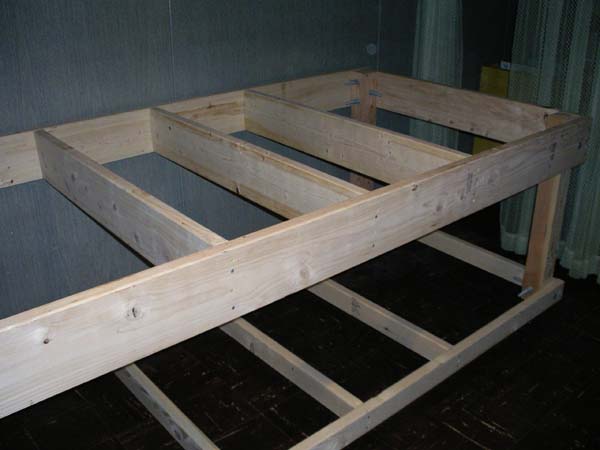
Photo by Ryan Farnung
Step2a: The frame that will support the enclosure.
Rubbermaid bins of various sizes can also be used, but remember that the bins must be supported by the lip of the container, as well as by the floor of the container. I have found that the concrete mixing bins are the perfect depth for my typical design, which involves a frame built with 2-inch-by-8-inch dimensional lumber and plywood, attached to the bottom to support the floor of the bin. A wood floor is attached to the top, with a hole cut large enough to fit the bin in, while allowing the lip of the bin to rest on top.
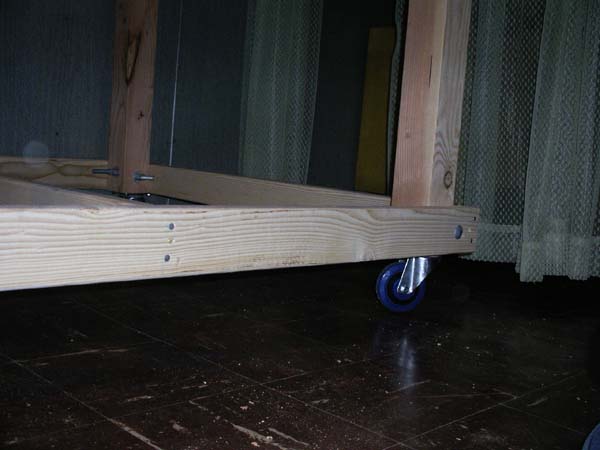
Photo by Ryan Farnung
Step2b: The frame is placed on coasters so that the enclosure can be moved for cleaning.
Step 2: The Structure
In any variation of my basic design, strength is a must. Dirt is heavy in even relatively small quantities, so I generally make everything to be twice as strong as I believe will be necessary. In general, I like to build heavy enclosures that sit directly on the floor, utilizing a frame to form the basis of the enclosure. In order to maximize space for the tortoises, I built my latest enclosure to sit up off the ground and allow room beneath for other enclosures.
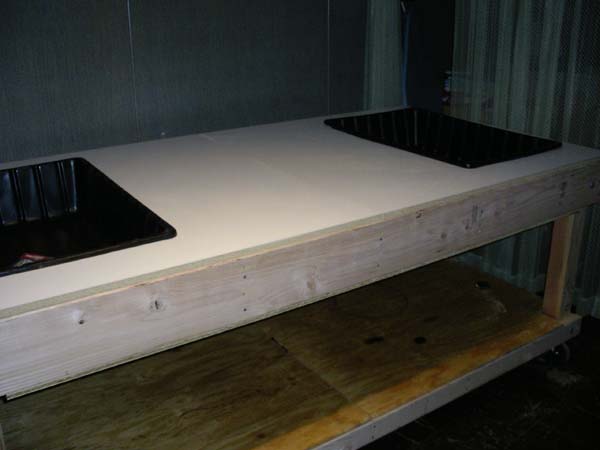
Photo by Ryan Farnung
The rubber bins are placed inside their individual frames within the floor.
Essentially, I built two frames. One is the frame made of 2-inch-by-8-inch dimensional lumber (as discussed above), as well as a mirror copy of that frame created out of 2-inch-by-4-inch dimensional lumber. These frames are joined to 4-inch-by-4-inch lumber, using large carriage bolts to create the shelf and raise the enclosure off of the ground. In the pictures, you may notice heavy duty casters are placed at each corner, which aid in moving the enclosure for ease of cleaning and maintenance. Again, dirt in even relatively small quantities is very heavy, and your ultimate design should reflect this.
Step 3: The Floor and the Walls
Melamine is not the easiest material to work with, but it is far from the most difficult. What I like most about the processed wood product is that it is water resistant and hardware stores typically offer a wide variety of precut sizes (usually sold as shelving). I used a single 4-foot-by-8-foot sheet to form the floor of my enclosure, but I had to cut it in half in order to get it down the stairs, and of course, holes were cut to accommodate the two nesting boxes necessary for my group of five tortoises.
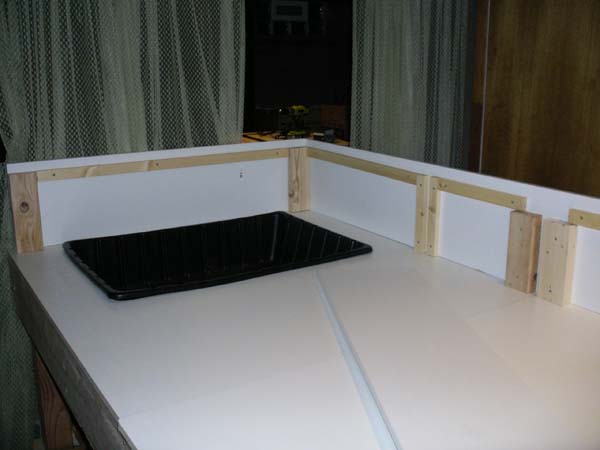
Photo by Ryan Farnung
The author purchased three shelves, measuring 12 inches wide and 8 feet long, to create the walls of the enclosure.
Given that I wanted 12-inch-tall walls, I was able to buy three shelves, measuring 12 inches wide and 8 feet long, to create the walls of the enclosure, and only one cut was necessary (separating an 8-foot shelf into two 4-foot walls). Melamine is essentially plastic coated particle board, and it will not hold screws well. I chose to connect the melamine walls in the corners by using dimensional lumber, oriented vertically, which the joining walls are attached to independently of one another (I refer to this as a “corner nailer”).
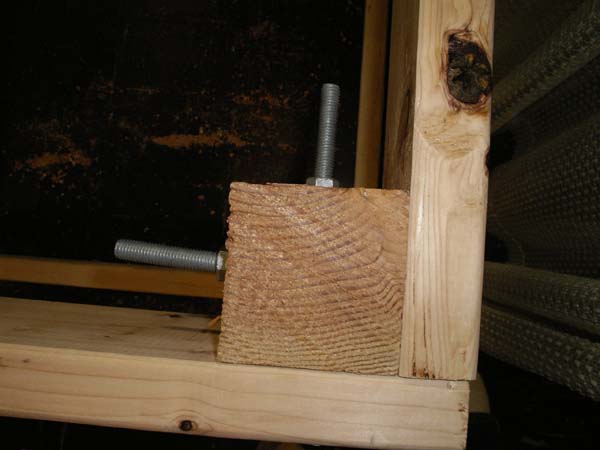
Photo by Ryan Farnung
To join the melamine walls together in the corners, the author uses dimensional lumber, oriented vertically..
In my design, the floor is never actually attached to the frame. I was able to attach the floor to the walls by driving screws through the floor from beneath the enclosure and into the corner nailers. As an added design benefit, I used some extra 2-inch-by-4-inch and 1-inch-by-2-inch lumber to create channels in which I could slide dividers if the need arises. These also create more spots to drive screws to attach the walls to the floor.
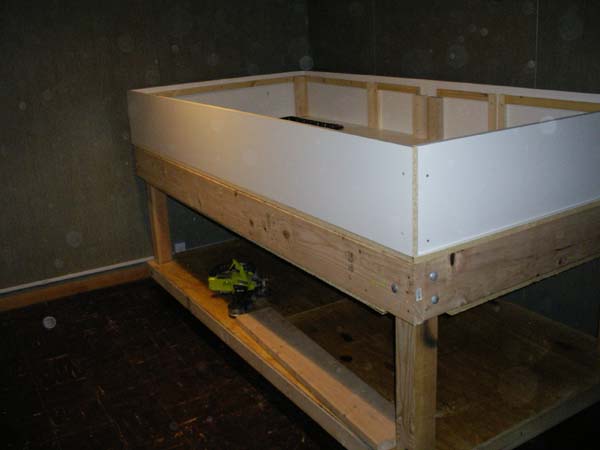
Photo by Ryan Farnung
Step3c: The walls are now finished, and it is time for the lid.
Step 4: The Lid
Many keepers choose not to use lids, but I prefer to utilize them for a couple of reasons. For one, a lid will help keep the environmental conditions in, as opposed to releasing heat and humidity directly into the surrounding room. Second, I have cats, and a lid is an effective deterrent. A lid can be solid, screen or both. I chose to make sections of my lid out of melamine, and I selected some handy metal screen window protectors from a home-improvement store to create ventilated openings that would support the weight of heat lamps.
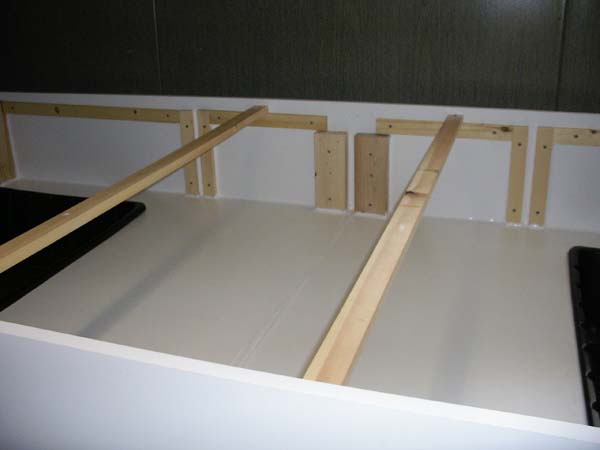
Photo by Ryan Farnung
Step 4a: To support the lids, the author affixed 1-inch-by-2-inch dimensional lumber strips to the inside of the enclosure walls about an inch from the top.
To support the lids, I simply affixed 1-inch-by-2-inch dimensional lumber strips to the inside of the enclosure walls about an inch from the top. Wood panels were then cut to rest on these strips, and the screens rest on the wood. Choose your own design, and feel free to make it as simple or as complicated as you like. A friend suggested creating two large lids with hydraulic assist springs that could easily be raised and lowered.
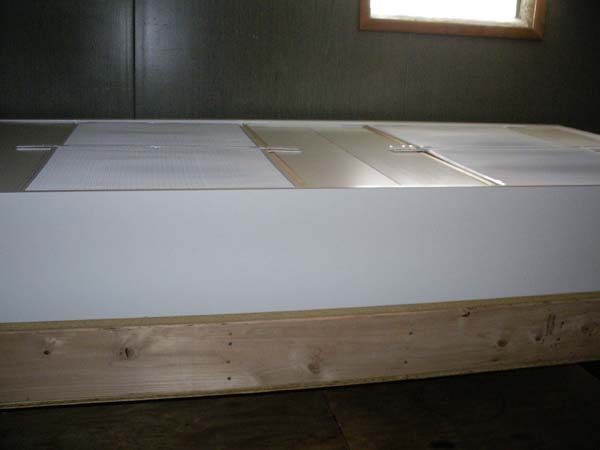
Photo by Ryan Farnung
Step 4 Finished: What the finished product will look like.
Step 5: Heating and Lighting
When I built my most recent enclosure, I chose to have a qualified electrician install a number of outlets in the room. Some of these outlets are on a dedicated circuit and on 24 hours, and some are on another dedicated circuit, which is timed to come on at 6:30 a.m. and go off at 8:30 p.m. This eliminates the need for power strips, extension cords and plug-in timers, which leave room for error. Also remember that heat lamps must always be adequately secured to avoid risk of fire.
Ryan Farnung is a tortoise breeder from Rochester, N.Y., who is driven by a passion for discovery. A professional hobbyist, Ryan also works as a freelance music teacher, musician and departmental manager at Beikirch Corp. He can be contacted at rfarnung@gmail.com.

