Expert breeding tips for the spiny-tailed monitor
As is the case with all reptiles, breeding the spiny-tailed monitor (Varanus acanthurus), also called an ackie, is very taxing on a female. Always evaluate the health of your females prior to any breeding attempts. Also important is that you not disturb the pair too much during the breeding period. I prefer to keep mating pairs together continually, whenever possible. I no longer keep together trios because it's too difficult to check on the individual status of each animal. Mating pairs kept together may need to be separated after a few matings in order to stimulate the response again.

Photo credit: Mike Donkersgoed.
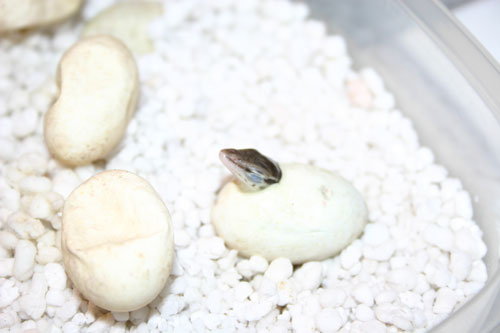
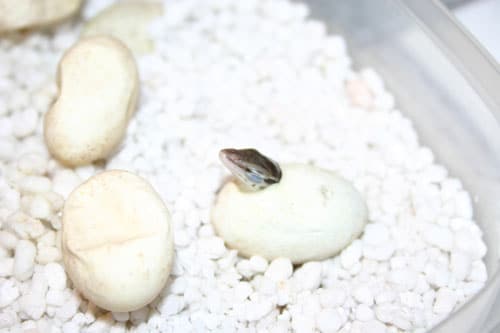
Notice the conditions of the eggs just before hatching. They cave in a little as they shed water.
In Australia, hatchlings emerge from their burrows during the wet season from December to March. In captivity, the seasons do not matter, and if food and heat is plentiful, egg-laying can occur several times throughout the year.
The male will initiate mating by trying to mount the female. If he is seen chasing her around the enclosure, mating is not likely to happen. Successful mating will only occur if the female is receptive. If she is, then she will lift her tail and allow him to copulate. Mating can occur off and on for up to five days. The pair will appear locked in the mating position for extended periods of time.
The laying area should be well in place before the female is gravid. Whether this is deep substrate that allows for burrowing or a nest box will be determined by your setup. Those who are using nestboxes say that 16 inches long, 12 inches wide and 12 inches tall is a good size.
A gravid female will have a huge appetite and be basking a lot of the time. She will look fuller than usual, almost appearing bloated. Another sign of being gravid is that the female will begin test digging, usually at night so as to conceal where the nest will be. This could begin a few days after mating, but it could also be only a few days before laying. First-time mothers don't seem as picky as veterans when it comes to a laying site. They will search for an area with a temperature around 86 degrees Fahrenheit and suitable humidity to ensure hatching. Once a suitable site is found, she will remain in the burrow for two to three days. After laying is complete, she buries the eggs and burrow entrance by packing the substrate down with her head. She will emerge, appearing deflated, a telltale sign that she has laid and you can start searching for eggs. The base of her tail could also appear thinner than earlier.
Mating to egg laying time is about 20 days. If close to 30 days, there is a danger to her health and the health of the eggs. Retaining eggs, also called dystocia, is the leading cause of death in females. It is often due to not providing proper egg-laying sites. However, dystocia can also be caused by the gravid female being in poor health prior to breeding, laying at too young or old of an age, or being disturbed or stressed prior or during the process of laying. Eggs held too long have also been known to die just prior to hatching time. During the laying process, be sure to get your incubator set up and temperatures stable at near 86 degrees. Once she has laid her eggs, it is important to get her back to good health as soon as possible. Lots of fresh water and food should be available. Some breeders even give fuzzy mice a calcium and water injection and offer them as food.
Egg Care
Once the eggs have been found, mark the tops of them with a soft-pencil so as to note egg orientation. Sizes range from 2.8 to 3.5 centimeters and weigh 4 to 6 grams. Fertile eggs are white and slightly elongated. Infertile eggs are darker in color. Those that are dead or dying have a slimy feel to them, which causes substrate to stick. Do not, however, throw out eggs that appear to be infertile. Leave them in the incubating egg container with the others until you are sure they are dead. Avoid rotating the eggs. Keep them in their original positions and place them in an egg box with a perlite medium mixed with a water-to-perlite by weight ratio of 0.8:1. All perlite is not the same. Search for a brand that has equal size medium particles. Egg box size depends on the number of eggs, but it should be large enough that the eggs are not too cramped. Err on the size of larger rather than smaller. A volume of space is required to ensure proper gas exchange from the eggs.
Remember that these are soft-shelled eggs, and they will absorb and release water and gases throughout their incubation. Depending on how stable the temperature and humidity in the incubator, incubation lasts between 90 to 120 days. The temperature of 86 degrees should be set in the egg box, not the incubator. The sealed environment of the egg box will usually have a higher temperature than that of the actual incubator. So, depending on your individual incubators setup, you will need to make minor adjustments until the required temperature is met.
The egg box can be covered with plastic wrap, held in place by an elastic or part of the lid cutout. If you use this method as opposed to a solid lid, you won't have to open the lid weekly for air exchange. If using plastic wrap, replace it with an actual lid as hatching time nears, so that the plastic won't be ripped by an early emerging hatchling. At this point, you will need to air the eggs out once per week.
Eggs that appear too full and round during incubation are taking on too much water and should be repositioned toward the container's center. Those that appear too flat or beginning to dent should be moved to the outside edges of the egg box. Condensation builds up on the sides of the container, creating higher humidity at the edges. If all appear to be denting early on in the incubation, use an eye dropper to add water to the perlite, but avoid putting water directly on the eggs. Only add water once per week and wait to see change in eggs before adding more. Nearing hatching time, the eggs will expel water and begin to dent. Do not add water at this time; you risk drowning the eggs.
Hatchling Care
If all goes well, the babies from your first clutch should be around 2 1/4 to 3 inches long. In a first-time clutch of 4 to 6 eggs, four may hatch if all conditions were met. Subsequent clutches can number between 6 and 12 with a 100-percent hatch success rate. Multi-clutching is possible with ackies as long as high temperatures and adequate food are always available.
Mating can occur again around two weeks after laying, and eggs deposited again 20 days after that. Once hatched, babies will live off food from the yolk sac for a few days. Usually in two to five days after the sac has been absorbed they will begin devouring one-fourth-inch size crickets. Make sure to provide adequate-sized prey. Young ackies will not go after anything that is too small. The width of the head is a good measurement for prey size.
Be sure to keep the babies well hydrated. At their small size, they can dehydrate quickly. I like to keep the group in a 20-gallon container for a few weeks, with wet paper towels, until I know they are all feeding well. After that I move them to a 70/30 split container, composed of a 70-percent substrate area and a clean, 30-percent area for food and water. Keep the humidity the same as for adults, but basking temps at only around 120 degrees Fahrenheit.
Mike Donkersgoed is a cabinetmaker living in Southern Ontario, Canada. Building custom enclosures and dwarf monitors are two of his passions. The June 1999 REPTILES magazine article on spiny-tailed monitors by author Jeff Lemm ignited his love for dwarf monitors.


